Elastic waistbands are an essential part of modern clothing. They are used in everyday leggings, shorts, and kids’ wear. These elastic bands make the clothes flexible, comfortable, and easy to wear. But have you ever wondered how to create your elastic waistband? No worries, it is not as tricky as it sounds. This complete guide to custom elastic waistbands will teach you everything you need to know in straightforward terms. So, let’s get started!
Overview of Custom Elastic Waistband

Let’s start from the basics and discuss what custom elastic waistbands are!
A custom elastic waistband is a band that uses elastic to hold up the clothing around you. Unlike a fixed waistband with buttons or a zipper, elastic waistbands stretch to fit around your body. They expand when you move or breathe, then shrink back into shape. This makes the custom elastic waistbands super comfortable for daily use.
Moreover, they can also fit a wide range of body shapes. For example, if you are chubby or skinny, the right measured elastic waistband will fit your body perfectly. Further, they are also easy to take off, put on, and adapt to changing body size. You can also add functional or decorative features to them to make them more comfortable.
Types of Elastic for Custom Waistbands
Elastic clothing bands come in various styles. This variety helps you choose the best one for your project. Here is the list of some common elastic waistbands.
- Fold-Over Elastic (FOE): This type of elastic has one shiny or decorative side. It is designed to be folded over the raw edges of the fabric. Therefore, it comes in many colors and designs to add glamour.
- Knit Elastic: It is soft, flexible, and won’t narrow when stretched. This elastic is great for lightweight fabrics. Moreover, it lies flat and does not easily roll, making it suitable for casual skirts and nightwear.
- Braided Elastic: This elastic has parallel ridges running lengthwise. It tends to narrow when stretched and may roll or twist inside casings. Therefore, you can use it for sleeves.
- Woven Elastic: Woven elastic is the strongest of all. It is thick and maintains its width when stretched. So you can use it for work pants and heavy garments.
- Clear Elastic: This is a transparent elastic made from polyurethane. It is lightweight and usually narrow. So you can use it for stabilizing seams or adding a gentle stretch where you don’t want visible elastic.
How to Measure for a Custom Elastic Waistband?
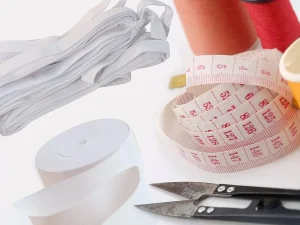
Getting the correct measurement while making a custom elastic waistband is the first and most crucial step. A good fit starts with the proper measurement. If it is too tight, you will be uncomfortable. However, if it is too loose, the cloth will not sit in place. So, before you sew your custom elastic waistband, here is how you can take the correct measurement.
1- Decide Where You Want the Waistband
First of all, you have to decide where the waistband will sit on your body. Usually, there are three spots for the waistband. The first one is a high waist(above your belly button). The second is the middle waist(around your natural waist). The last third spot is low waits( near your hips). So stand in front of the mirror and place the piece of elastic around any spot you choose. After that, move around to make sure that it feels comfortable.
2- Use a Measuring Tape
Now, take a soft measuring tape and wrap it around the spot you choose. However, always keep the tape flat to your skin. It should not be too tight, but snug and comfortable. For the right measurement, I recommend that you stand up straight and breathe normally. Now, notice which number on the tape feels comfortable. This number is your waist measurement.
3- Subtract for a Snug Fit
Elastic usually needs to stretch to stay in place. If you cut it exactly to your waist measurement, it will be loose, and you will feel uncomfortable. So I recommend cutting the elastic about 1 to 2 inches less than the actual waist size. For example, if your waist size is 34, cut the elastic to 32 or 33. However, the amount you subtract depends on how tight you want it.
4- Add Seam Allowance
Seam allowance is the extra length of elastic you leave to sew the elastic ends together. Let me explain it with an example. Suppose your final elastic length is 32 inches. But you will need an extra small length of usually ½ inch to overlap the ends and stitch them securely. This extra half inch will be considered as seam allowance. It gives you extra room to sew the elastic waistband without making it too tight.
5- Mark the Elastic Before Cutting
The last step for the correct measurement of the elastic is to mark it into equal parts. This makes it easier to attach the elastic evenly to the fabric and prevents bunching. First, fold the elastic in half and use a marker to mark the midpoint. Now fold it again in half, and you will get four equal points. Mark each point with a marker, and you will end up with four equal points.
How to Make Custom Elastic Waistbands: 3 Methods
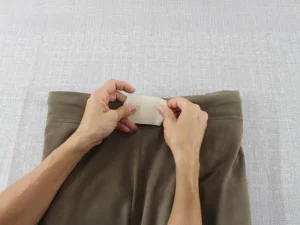
Making an elastic waistband at home is not a big deal. When you have measured the elastic properly, it becomes pretty easy to sew the waistband and finalize it. Let’s explore how to add elastic to a waistband or how to make an elastic waistband in 3 ways.
1- Cased Elastic Waistband
This is the easiest, beginner-friendly, and most straightforward method to make a custom waistband. In this method, the elastic is hidden inside the fabric tunnel, which is known as the casing. To start this method, you first have to sew the garment’s waistband casing. However, leave a small opening of 1 to 2 inches unstitched. After that, cut your measured elastic and attach a safety pin to one end.
Now feed the elastic through the tunnel and gently gather fabric back as you go. Once the pinned side of the elastic comes out from the other side of the opening, stop there. Overlap both ends of the elastic by half an inch and sew it using a zig-zag stitch. Finally, you have to close the casing opening for a smooth finish. So use a straight stitch and sew the opening.
2- Exposed Elastic Waistband
In this method, elastic is stitched directly onto the fabric. Therefore, it is visible from the outside and gives a sporty look to casual clothes. It is also a simple method, but it requires some extra steps. For example, first, cut the fabric and elastic to a measured size. After that, divide each one into four equal parts using marks. Now, pin the elastic to the fabric, aligning the marks.
Here, the elastic will feel shorter than the fabric. But don’t worry, it is normal. So, place the first mark under the sewing machine and start stitching. However, slightly stretch the elastic to match the fabric length and sew it using a stretch stitch. After sewing all around, you can optionally fold the elastic down and sew again to secure and hide the edges.
3- Encased Elastic with Topstitching
This is the last and stylish method of making a custom elastic waistband. It is the combination of both of the above methods. HOW? The elastic is placed in a casing, but you also have to sew through the elastic and fabric to make everything secure. So the first step in this method is creating a casing like the first method. After that, insert the elastic into the casing using a safety pin.
Overlap the two ends of the elastic and sew them. Also, close the case opening to give a smooth finish. Now, when the custom waistband is ready, it’s time for top stitching. You have to sew one or more lines across the waistband from the upper side. This will make the waistband neat and prevent the elastic from twisting inside the casing.
How to Choose the Right Custom Elastic Band for Your Business?
If you are running a clothing business, choosing the right custom elastic band is the key. The elastic you use affects how much they last and how happy your customers are. So, are you confused about choosing the right elastic band for your project? Worry not! Here are some tips you can follow.
- Know Your Product Type: First, think about the product you are making. Different garments need different types of elastic. For example, sportswear needs strong, flexible elastic that holds up under movement. However, baby or kids’ wear should use safe, soft elastic that won’t irritate the skin.
- Pick the Right Material: Elastic bands come in different materials. For example, polyester is strong and suitable for everyday use. Nylon is soft and great for clothes that touch the skin. In the end, latex and rubber bands are very stretchy and can irritate.
- Check Stretch and Recovery: Good elastic should stretch easily. Also, they return to their original shape without becoming loose or wrinkled. However, the low-quality elastic bands may stretch too much and don’t bounce back. So always check the quality by checking stretch and recovery.
- Work with a Trusted Supplier: To get the best result, it is crucial to work with a reliable band manufacturer. If you’re looking for bulk options, working with an experienced elastic band manufacturer from China can be a wise choice. These manufacturers offer a range of styles, materials, and customization to meet your needs.
- Consider Budget: While quality is important, you also need to think about cost. So, balance your budget with your brand’s needs. Sometimes, going for the cheapest option may lead to poor results. So I recommend testing samples before commenting.
Conclusion
Custom elastic bands seem to be minor details. However, they play a massive role in how comfortable, stylish, and functional a garment feels. If you are making the custom bands by yourself, measuring them correctly is crucial. If you measure the wrong size, it may feel too tight or loose. As a result, you will not be comfortable with that garment.
That’s why I have discussed everything about custom waistbands, from measuring to sewing methods. Among the three common methods, you can choose any depending on your fabric and needs. Moreover, if you are starting your clothing business, selecting the right elastic band is also crucial. For this purpose, you should check quality, stretchability, and experienced suppliers.