Lace trim is one of the easiest and most beautiful ways to upgrade your clothes. Not only this, but adding lace trim can also upgrade home décor and even handmade projects. A lace trim makes a simple piece of cloth into an elegant one. However, for beginners, it might seem a tricky task. That’s why they often ask, “How to sew lace trim properly?”
Actually, lace trim is a decorative fabric made with delicate patterns. Those patterns often feature flowers, loops, or intricate designs. Usually, people use it at the edges of the cloth to add a decorative touch, but there are no hard-and-fast rules. If you are also new to sewing lace trim, worry not! In this guide, I will explain, step by step, how you can sew lace trim. So let’s get started.
Basic Methods to Sew Lace Trim
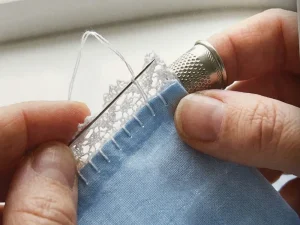
Before you get started, you must know that there is no one way to sew lace trim. Instead, there are several ways to add lace trim to your clothes. However, the choice depends on your experience, expertise, and ease of use. Before we discuss the steps, let’s look at some basic methods for sewing lace trim.
1- Sewing Lace on Top of Fabric
This is the easiest method for beginners to sew lace trim. In this technique, the lace is simply placed on top of the fabric rather than tucked inside or sewn between layers. It means everything remains visible during sewing. So, you have full control and can sew more neatly.
For this method, first place the lace trim on the edge of the cloth where you want to sew it. Then pin it so it remains aligned with the cloth. After that, start stitching slowly along the edge of the lace. For this method, usually a straight stitch is best, so go for it. But remember, if your lace has a clear pattern or border, follow that line to keep your stitching straight and clean.
2- Sewing Lace into a Seam
Another method is to sew the lace trim into the seam. Actually, this method is somewhat more advanced than the one above. So you must have some stitching to start it now. In this method, basically, the lace trim is sewn between two pieces of fabric. As a result, part of it is hidden inside the seam while the decorative edge shows on the outside. So, this type of sewing gives your clothes a professional look.
If you are choosing this method, simply place your lace between the two fabric pieces. However, the right sides of the fabric must be facing each other. Also, make sure the decorative edge of the crochet lace points inward. Why? Because when you turn the fabric later, the lace will be visible on the outside. Once everything is done, sew along the seam line using a straight stitch, just like you would for a normal seam. After stitching, turn the fabric right side out. You will see that the lace is now neatly attached.
3- Adding Lace to Edges (Edging Method)
Now there is an edging method. You can choose this method when you want to decorate the cloth and finish the raw edges of the fabric at the same time. How? Actually, here, you have to attach lace directly along the edge so its decorative design is clearly visible. It will give your fabric a soft, neat, and polished look by hiding its raw edges. To start, place the lace along the edge of your fabric.
But make sure the straight side of the lace lines up with the edge of the fabric. At the same time, the decorative elements (such as patterns) of the embroidered lace trim should hang slightly beyond the edge. Now, sew along the top edge of the lace, and fold its raw edges. When you finish, the lace trim will be added, leaving no frayed edges.
How to Sew Lace Trim: Step-by-Step Guide
Now you have a basic idea about the methods you can use during sewing lace trim, right? Now, let’s discuss the complete sewing process step by step so you can do it confidently.
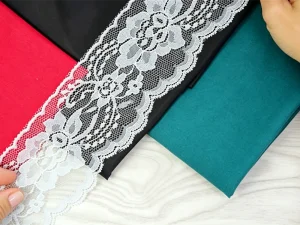
Step 1: Prepare Your Fabric & Lace
Before doing anything, the first and most important step is preparing your fabric and the lace trim. This preparation is what makes the final results professional and neat. First, wash your fabric and lace trim, as some fabrics may slightly shrink after washing.
So it’s best to wash them before sewing so that there is no problem with size. After you wash the fabric and it’s dry, gently iron it. Why? Because the wash wrinkles can cause issues in measuring the lace trim. Smooth, wrinkle-free material is much easier to work with, helping you sew straight, clean lines.
Step 2: Measure & Position the Lace
Now your lace and fabric where the lace will go are ready. Right? The next step is to measure and position the lace trim. This is a slightly critical step, as a slight mistake in the size can ruin your entire lace trim. So start by measuring the area of the fabric where the lace will go. Use a measuring tape to get an accurate length. Then measure your lace and cut it to the appropriate length.
However, at this point, I suggest cutting the lace slightly longer for safety. After measuring, place the lace on the fabric in your desired position. But don’t rush at this stage. Make sure the lace is straight and evenly aligned with the fabric edge or design line. If the lace looks tilted or uneven now, it will look the same after sewing, so adjust it carefully.
Step 3: Secure the Lace in Place
Once you have measured and cut the lace trim, you cannot start sewing immediately. Instead, you have to secure it with pins, especially if you are a beginner. This securing ensures the lace will not move during sewing, as such movement can cause uneven stitching. So take pins or clips and hold the lace onto the fabric. However, place them at regular gaps, especially along the edges, so the lace stays flat and stable.
Also, make sure that pins go through both the lace and the fabric so everything stays connected. If your lace is very thin or slippery, I suggest using a few extra pins for better security. Now, when the pins are secured, take a look at the entire fabric. So if you see anything misaligned, you can fix it at this stage. But once you start stitching, it will be difficult to reset. So make adjustments if needed.
Step 4: Stitch the Lace Carefully
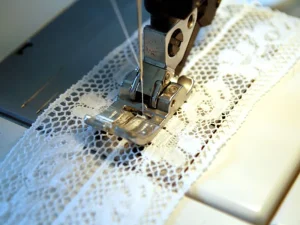
Finally, when the lace trim is secured with the pins, it’s time to stitch. You can choose the stitching method I discussed above based on your project requirements. If you are a beginner, I always recommend choosing the simple sewing-on-lace method with a straight stitch. So begin sewing from one end and move slowly along the edge of the lace. However, try to keep your stitches close to the edge.
Such stitching ensures that edges stay hidden or blend nicely with the design. While stitching, also gently guide the fabric, but do not pull it. Let the sewing machine do its job; you just need to guide the fabric and lace. When you reach corners or curves, slow down even more. Take small stitches and adjust the fabric carefully so the lace follows the shape smoothly.
Step 5: Finish & Clean the Edges
Now that you have attached the lace trim to the fabric, the final step is finishing. Usually, beginners skip this step, but it is of utmost importance because it makes your project look professional. So first, look at the stitches you made earlier. If you find any loose threads, uneven lines, or small gaps, gently trim them with scissors. But be very careful not to cut the stitches, as the loose stitches will make the seam weaker.
Next, if there is extra fabric or lace beyond the stitching line, trim it neatly. Make sure the cut is clean and even, so it doesn’t look messy. After trimming, press the lace gently with an iron on low heat. But never place the iron directly on the lace trim. Instead, place a thin cloth over it to protect the delicate lace from damage. This pressing will give your lace trim and fabric a finished and professional look.
Hand Sewing vs Machine Sewing: Which One Is Best For Sewing Lace Trim?
There is no one-size-fits-all answer to this question. Both sewing techniques have their own strengths and weaknesses. For example, hand-sewing to attach lace trim is one of the most beginner-friendly ways. By sewing by hand, you have full control over each stitch. You can move slowly and adjust the lace as needed, even if you can easily fix small mistakes as you work. Hand sewing is best for small projects and delicate areas.
On the flip side, machine sewing is much faster and stronger for attaching the eyelet lace trim. A sewing machine creates even and consistent stitches. As a result, you get a clean and professional finish. It’s also best when you are working on large projects, like adding lace to the curtains. It will make the project much faster. However, for machine sewing, you must have some expertise and practice for better results.
Conclusion
Lace trims are the most effective and easy way to decorate any piece of cloth. However, when it comes to sewing these lace trims, many get confused. That’s why, in this guide, I have discussed step-by-step processes and some basic sewing methods. You can choose a sewing method based on your skill level and project needs. But remember, each step in sewing the lace trim is very important. Also, you can choose between hand sewing and machine sewing. Both fit differently depending on the project’s size and your skill level.