I’ll be honest: I used to hate bias tape. I thought it was fiddly, annoying, and honestly, a little intimidating. Every time I tried to use it, I ended up frustrated. But that’s no longer the case. Once I learned the tricks, bias tape became one of my favorite sewing tools.
If you have wondered why some necklines and hems look so neat, it’s likely because of bias tape. In this post, I will explain how to use bias tape. Whether you want to use single or double fold, make your own, or sew it around curves, you will find some useful information, tips, and tricks here.
What Is Bias Tape?
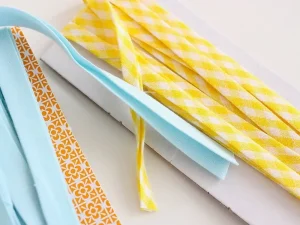
To put simply, bias tape is a piece of fabric cut on the bias grain. It is cut at a 45-degree angle to the cross and straight grain of the fabric. This angle gives the tape a slight stretch that makes it hug necklines, armholes, and other types of curves without puckering.
It is not that bias tape is always functional. It can be decorative too. It gives a finished look to the raw edges and prevents fraying. Bias tape also adds a clean and polished touch. The difference between a plain helm and one with bias tape is that the latter feels complete.
Single Fold vs Double Fold
Bias tape can be categorized into two styles: single fold and double fold.
- A single-fold bias tape has edges folded once toward the back. It is thin and perfect for delicate finishes and fabrics. This tape requires a seam allowance about half its width.
- A double-fold bias tape, on the other hand, starts as a single fold and then is folded in half again. It is thicker and wraps fully around the raw edge. Because the tape completely hides the raw edge, it needs no seam allowance.
I use double-fold for jackets, quilts, and heavier fabrics. Single fold is usually suitable for blouses, tank tops, and projects that require a neat and subtle finish.
Can You Make Your Own Bias Tape?
You can buy ready-made bias tape, and they can be pretty convenient. However, there may be reasons you may want to make your own. You can use the leftover fabric, which means you do not have to waste the small scraps. You can choose colors and patterns that perfectly match your project. And you can make the tape as narrow or wide as you want.
My personal favorite is the continuous bias tape technique. Here is how it works:
- Fold the fabric on the bias and cut strips according to the finished width. For a single fold, lines should be double the finished width apart. For a double fold, four times the width.
- With a ¼-inch seam, sew strips together. Then press the seams open.
- Fold the edges toward the center. Then press and fold again to turn it into a double-fold tape.
A bias tape maker is not necessary. To guide the fold, I use a long straight pin pinned to my ironing board. Place the fabric under the pin. To fold the tape perfectly, press it with your iron. You can use this method for bias fold tape of any size.
How to Sew Bias Tape
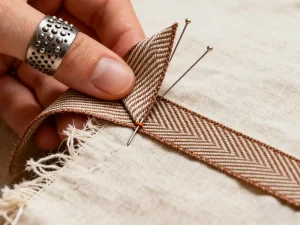
The procedure of sewing bias tape is pretty straightforward. The exact steps depend on the type of bias tape you want. Below, I am providing step-by-step instructions for sewing both types.
Sewing Single-Fold Bias Tape
In single-fold bias tape, you have to fold the raw edge under. Here’s how I approach it:
- Decide which side of the tape you want to be on. Once you have decided, start sewing from the opposite side.
- Use your iron to steam and shape the tape along curves.
- Stitch in the crease that is closest to the raw edge.
- Fold your tape over the desired side. Then press it and sew the inner edge.
You will find single-fold tape pretty cool with delicate fabrics. It is lightweight, subtle, and leaves a neat and clean finish. I use it for light skirts, tank tops, and necklines that don’t look bulky.
Sewing Double-Fold Bias Tape
Here’s how to sew on double-fold bias tape that wraps completely around the raw edge.
- Pin the tape to the wrong side of the fabric. Align the raw edge and the narrower edge, and clip or pin it in place.
- Stitch along the fold closest to the narrow edge. This keeps the tape secured to the fabric.
- Covering the stitching line, fold the tape over to the right side.
- Topstitch on the right side, along the folded edge.
This technique works fine with both straight and curved edges. Sew the corner. Fold at a 45-degree angle. Ease the tape around the curves without pulling it.
Over the years, I have discovered some bias tape sewing hacks that make the process a bit easier. Here they are:
- In some cases, particularly for straight edges, I skip pre-folding.
- If there are thick quilted fabrics, I trim the seam before folding the tape.
- For double-fold bias tape, I often sew in two passes. First, I sew on the wrong side. Then I topstitch on the right side.
These little tricks can make a project look professional.
Mistakes to Avoid When Using Bias Tape
If you are not careful, making DIY bias tape can actually be a bit tricky. Here are the mistakes I made when I first started, and how to fix them:
- Overstretching the tape: Too much stretch distorts the curves and puckers the fabric. Do not pull the tape. Always ease around the curves.
- Skipping pressing: The quality of stitching depends on pre-pressing folds. Be sure to iron the folds before sewing, especially on curves.
- Wrong side placement: You have to start the single-fold tape on the opposite side of the finished edge. With a double fold, the placement is more forgiving because this fold hides the raw edge.
- Not using enough pins: Don’t be lazy here. Put enough pins on the curves. They prevent shifting and help make the edges smooth.
Every time I pick up bias tape, I remind myself of these mistakes. By paying attention to these points, you will get results that look professional.
Sewing Around Curves
Most people find curves a bit intimidating. I used to have issues with neckline finishes. Then I found these simple yet effective techniques:
- Ease the tape: Along the curve, pin small sections. Do not try to cover the entire curve in one pass.
- Pivot the needle: At each pin or corner, stop the needle down. To keep the tape aligned, lift the presser foot, rotate, and continue.
- Small stitches: For curves, the best stitch length is 2-2.5mm. It gives you more control over the thing, and it looks cleaner.
- Use steam: For single fold tape, shape the fold using light steam before stitching. It naturally molds the tape to the curve.
The entire process of making bias tape becomes seamless once you master curves. If the curves look good, the project will look high-end.
Some Creative Uses of DIY Bias Tape
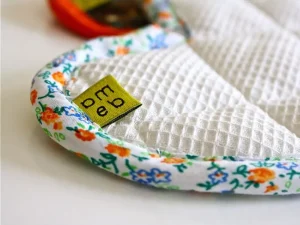
Apart from finishing edges, there are some other use cases of bias tape. Here are some creative bias tape uses:
- Decorative trim: To highlight necklines, hems, or cuffs, use contrasting colors. If you add the same color to any jacket, it will look custom-made.
- Quilt details: To enclose seams in quilt coats, consider using double fold tape. It adds a good-looking finish on both sides.
- Inside seam finishes: You can make garments reversible by using inside seam finishes. If the seams are finished properly, you can wear something inside out if you want to.
- Accenting flaps or pockets: A simple garment can look elegant with small touches like this.
From my experience, I can say that projects with bias tape look polished and intentional. This is one of the details that makes people ask me: “Did you buy or make it?”
Tools I Use Regularly
Over the years, I have discovered some tools that make bias tape easier:
- Bias tape makers: They help fold the strip properly. I always keep bias tape makers of different sizes.
- Glass-headed pins: You can use any pins you find convenient, but glass-headed pins hold the tape securely and do not melt near the iron.
- Iron: Steam is essential for curves. Pre-processing folds are also important.
- Ruler and rotary cutter: When making your own tape, these tools can significantly speed up the process.
Of course, not all these tools are necessary. But you may find the process slow and messy without them.
Wrapping Up
Bias tape is not just functional; it also makes your work beautiful. Single fold tape is subtle and delicate; use it for lightweight projects. Use a double fold for quilts and heavier fabrics. You can buy bias tape, but making your own offers more room for customization and creativity. You can also use the leftover fabric.
Hopefully, now you have a better understanding of how to make bias tape. Use the right tools and experiment with colors and fabrics. Above all, be patient. Start small and keep practicing. Rest assured that soon your projects will look more professional.